Hi all,
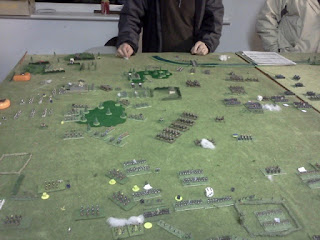
As promised, here is the second part of our Wagram game in 6mm using the Shako ruleset. We left things in the thick of the action, the French concentrating much of their forces in a breakthrough attempt on their right. An Austrian flank march had just turned up on the extreme of that flank though, adding a certain urgency to the forward momentum of the breakthrough attempt. This is pictured below.
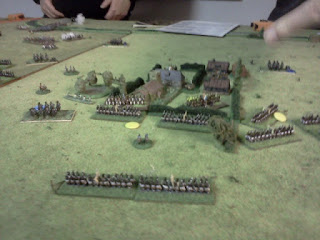
Meanwhile, both commanders on the French left had reformed their divisions out of bootlaces and spare parts, and were about to launch at each other again.
As you can see, this part of the board seems less crowded, but if either side could break their opponents here, then they could roll up the length of the board. The town you can see in the middle has a French division in garrison.
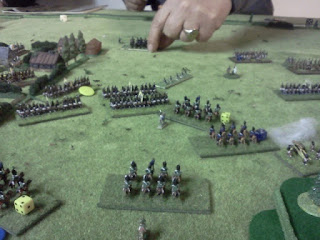
The Austrians started the ball rolling by launching a cavalry division at the attacking French infantry, whilst further along their infantry began the journey towards the central town. If you see a small piece of paper next to a unit, that means it's in square. The bases didn't give us the benefit of fiddling around with the formations.
I think we know who this is supposed to be.
...and look what's heading towards him. Well, you'd possibly be able to tell if I hadn't lost focus on my camera in all the excitement, but the Austrian flank marching cavalry managed to swing right round the back of the French army and were set on causing as much confusion as possible.
As it was, they hassled and sowed confusion amongst the French reserves, causing the redeployment of artillery and preventing commitment of infantry, including the Guard units. Pretty good for a cheeky manoeuvre.
Infantry in the flank march had to punch through a hastily-formed French screen, and so began another epic struggle as they fought to push their way into a garrisoned village.
Having weathered the attacks by the Austrian cavalry with some casualties, the French right continued to apply pressure to the Austrians. The Guard cavalry were almost in position to provide assistance, but attacks continued to go in.
Switching to the other flank now, it was the Austrians looking to sledgehammer their way to victory. Here you can see them moving up, and the French anchoring their position on the town. The pictures start next to the central town, and move outwards towards the board edge.
Blue counters represent horse units that are blown.
Back to the French extreme right, and the fight for the village takes on symbolic importance more than anything else as more and more Austrians get sucked into the battle.
The Guard cavalry are finally in striking distance of the Austrian lines, seen here approaching in a column of units through the chaos towards the camera and the waiting (and slightly anxious) Austrians.
A picture at the crucial point in the battle, from the view of the figures at the very back of the Austrian position on the ridgeline. Even these guys had to endure cannon fre throughout the battle, such was the pressure brought to bear.
At the same point in time, here is the scene shown from the French rear. Note the divisions still held back- partly through reluctance to commit ever-dwindling resources, and partly through having to keep an eye on marauding Austrian cavalry.
The fighting on the French left continued as the Austrians continued their advance towards the town, a fierce musketry duel erupted down the line between the armies...
...and then the assault began in earnest as the first Austrians began a bitter struggle for the town itself.
The musketry duel saw the French stagger and inflict great loss upon the Austrians, resulting in a general advance to capitalise on the sitution.
Battered Austrian units fell back through the lines behind them.
It was hard keeping up with events, as I now had to turn my attention back to the other side of the table, as successive waves of French Guard cavalry crashed into the Austrians.
All the while the Austrian flank attack maintained the pressure on the now solid French side, content to tie down increasing numbers of enemy troops and inflict as much damage as possible.
Here's a couple of distance shots of the battlefield. The first shows the French right side.
On the left, in this second shot, both players were surpised that either of their forces had taken so much punishment yet seemed to continue to fight. It's true that I can't think of a divional morale roll throughout the game that failed for either side.
The fighting continued across the table, the noticeable shift coming on the French left as Austrian numbers and inexorable attrition saw them begin to be ousted from the town, despite spirited resistance from the infantry units outside.
Finally, on the French left the Guard cavalry had been forced to pull back after more hard fighting. Only they could come through such a fight with models still on the board, let alone still facing the enemy, but they just could not break the Austrian lines.
At that point, at the end of four club nights of play, it was agreed that the end had to be called. Both sides were spent forces by the end, and we agreed that laurels would go to the Austrian side for preventing a breathrough, although their army had been annihilated to at least the same degree as Napoleon's. It was indeed an epic- sometimes a game just seems to take on a special significance and all players and spectators agreed. We all afterwards started comparing collections of 6mm Napoleonics, to see what else we could do. It appears that just about everything is covered, so I hope to be showing more such games in the future. I've now got Russians to paint so who knows?
Leigh
Welcome to the Eastbourne Men At Arms wargames club blog. Eastbourne Men At Arms has been running for more than 25 years, with current members both old and new. We meet every Monday evening from around 7 'til 10 in a secure room that we lease on a full-time basis. This blog will tell you about us and give pictures of our games.
Sunday, 11 March 2012
Subscribe to:
Post Comments (Atom)
If you're interested in finding out more about our club, or would like to join, then please contact our club secretary Peter Helm on (01323) 732801. The club facilities are based in Lower Dicker, times from 7- 10pm every Monday.
Subscription fee is £4.00 per evening, which includes use of club tables and scenery. Your first week is free. Storage for member's belongings is provided for multi-week games at no additional cost.
Subscription fee is £4.00 per evening, which includes use of club tables and scenery. Your first week is free. Storage for member's belongings is provided for multi-week games at no additional cost.


No comments:
Post a Comment